

Hi, I'm Thomas, CTO here at Morpher. In this post I want to talk a little bit how the Wallet-Components are set up and why we built the wallet in the first place. It's a pretty technical article, so if you are a developer then this article is for you.
Why yet another Wallet?! 🤔
Morpher's goal is to make trading using Blockchain tech accessible to the masses. Current wallet implementations are all very very secure, but not very convenient for users to use. They are also very often not easy for developers to work with. We think that convenience doesn't have to jeopardize security.
We started Morpher with three different wallets: MetaMask, Portis and Fortmatic. The integration with wallets usually works like this: The wallet injects a full web3 object into the website and takes care of connecting to a node, as well as providing a keystore to sign transactions. So, essentially you need to connect to the right node and then have means to sign transactions that get sent through the wallet's connection to the node. Those are two components: A Http/WebSocket connector and a keystore, both in one “wallet” that takes care of signing and sending.
Having both in external components gives very little control back to the developer. For example, with MetaMask you can't directly influence to which network to connect to – the user needs to do this. Besides some small advances in new RPC calls that allow developers to automatically add a new network, all you can do is listen and observe which network the user is connected to and inform then via a modal or some sort of alert that the user is connected to the wrong network.
MetaMask
Imagine you are a user who never touched Blockchain.
Now you need to setup MetaMask before you start to use a platform. You have to download a browser plugin you never heard of that has a fox-head following your mouse pointer. Then you need to enter a secure password – and god forbid you lose it. Then you are asked to remember a seed phrase. At this point you have no idea what a seed phrase is, but it sounds like you just started your internship at the CIA.
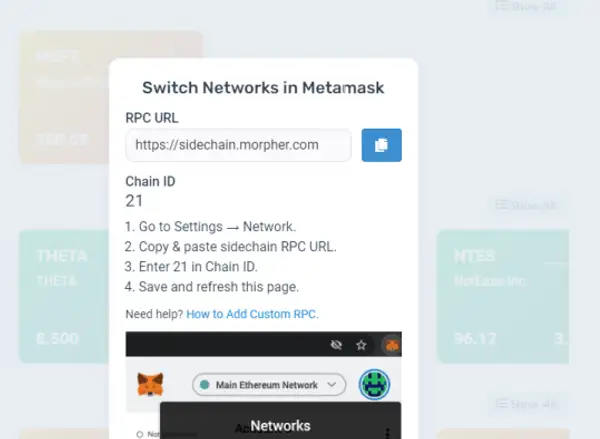
If you haven't given up at this point you are then greeted with a popup to enter network details and switch around something which sounds very scary to the regular user. Now you made it to the Morpher Sidechain 🎉 (like us, chances are that your DApp also operates on a layer-2 network).
To top it off, you get one ETH to sign transactions on our sidechain. These are like testnet ETH on our POA sidechain, and are essentially worthless. Nevertheless MetaMask tells you that you are rich. Needless to say, it's very disappointing to find out your new fortune isn't a fortune at all and those $3,000 in your wallet are not real. But at this point, these are all just details, because most users already gave up on downloading MetaMask.
They come to trade, not to become blockchain experts.
Portis and Fortmatic
Here come the hosted wallets. Let's just focus on Fortmatic (or Magic?) for now.
It also makes the full web3 object accessible to the website. That means, it does two things: connect to a network and provides a keystore.
It claims to be non-custodial. It uses AWS KMS for encryption. But essentially is a man-in-the-middle as a relayer in the recovery process and has your recovery keys stored within their own infrastructure 🤷♂️.
It does let you style the popups a little bit. But if Fortmatic decides that everyone needs 2FA today, so be it. Nothing you can do about it. If Fortmatic decides tomorrow that you need to verify your email address again, so be it. If Fortmatic decides that exporting your private key is deleting the account, well, nothing you can do. If Fortmatic decides that it won't connect to your layer-2 network anymore, all you can do is pray to the all-mighty blockchain gods. And Fortmatic has not decided to let developers or users turn off transaction-confirmation screens at all (and those pop-ups are not pretty on mobile). But there is only so much you can do about it.
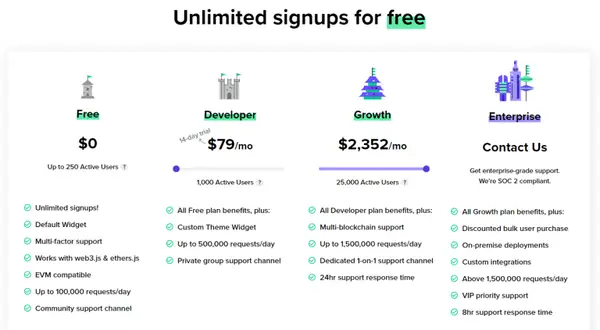
It's not enough being at the mercy of third party providers in a world, you need to have deep pockets. Pricing is based on user-signups. You're on the hook the moment your DApp takes off, even if you haven't monetized those users yet.
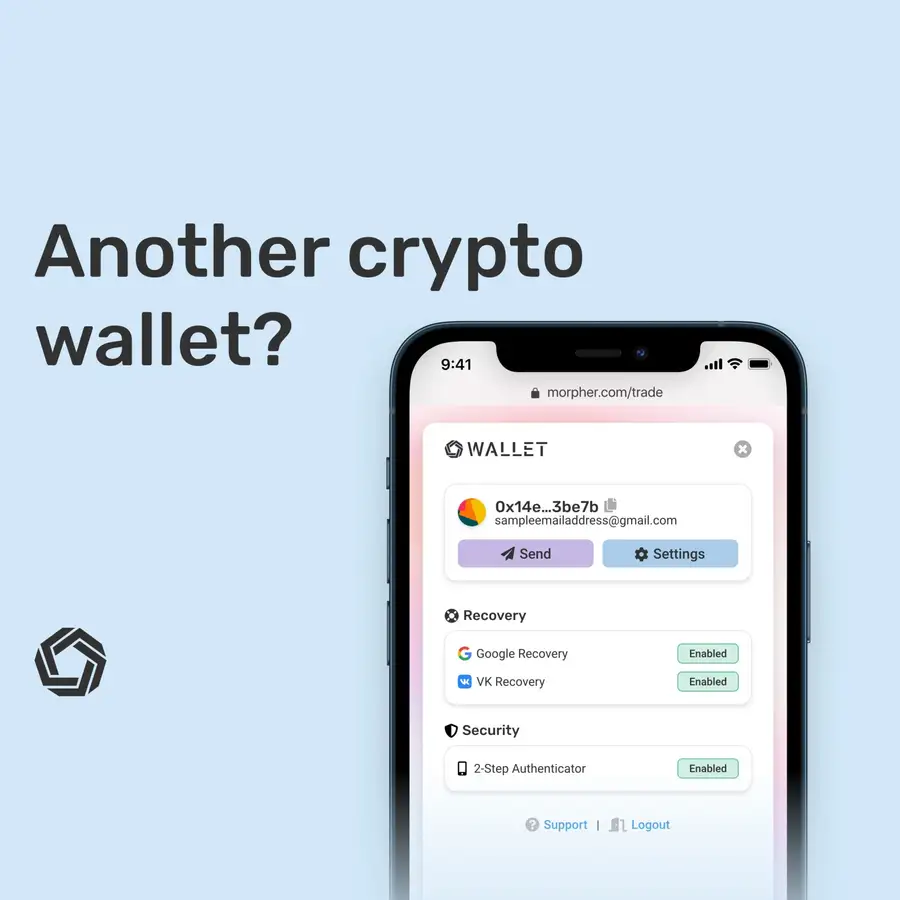
Introducing Morpher Wallet
Now think about this:
You are a user who comes to Morpher. You are used to web 2.0 signup flows. You want to sign up to trade. You want to go long on Tesla. You don't want to worry about (and don't have any reason to know about) signature popups, seed phrases or private keys. You can do all that cool crypto stuff too, but first and foremost you are here to trade, not to learn how crypto works, export seed phrases or learn why it is better to use PBKDF2 over SHA256 to encrypt stuff.
Or you are like us: You are a developer. You want to give your users a smooth experience. You want to have a non-custodial solution and full control over how it looks and feels without compromising too much on security.
This is why we built the Morpher Wallet. But how does it work?
Technical Rundown
After that esoteric introduction on why we built the wallet, I am sure you are also interested in the full tech rundown. After all, we're developers. So, let's do this!
Morpher Wallet uses 3 components.
- A Backend Component, written in NodeJS/Express, that never sees an unencrypted private key or seed phrase. It's basically store&retrieve for encrypted keys.
- A Frontend Component that acts as a keystore and interface.
- And an SDK that creates a web3 object and gives it to a website. It connects the wallet as an iFrame and makes sure the communication between the iFrame is secure and things like web3.eth.signTransaction work.
Let's take this step by step and see what happens for example on signup up, before diving into into the communication between the iFrame and parent.
Signup and Non-Custodial Data-Flow
When a user signs up, the Frontend generates a seed phrase using bip39.
It's working all on the frontend at this point – the backend sits there idle, only telling the frontend if a user with that email already exists.
The frontend then hashes the user's password, uses that hash to encrypt the seed phrase using AES-GCM 256 bits with 10000 SHA-256 iterations PBKDF2. Fairly industry standard at this point.
After that, we store the encrypted keystore on the backend.
We also store the encrypted keystore in localStorage, so the user just needs to enter the password next time he opens the browser, but that's a different story and purely convenience. It doesn't jeopardize the fact that everything is non-custodial and encrypted.
Login
So, a user is registered, but where's the data coming from to get to the magic private key? It's stored in the backend, but encrypted. Besides having all the usual best web practices to not to fall victim to DDoS attacks etc., the key is also only decrypted client-side.
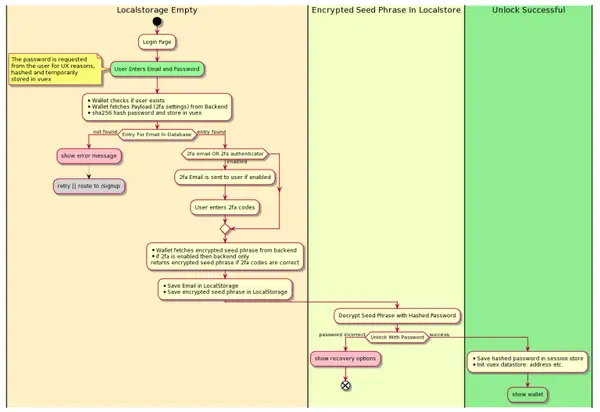
It works like this:
- The user enters the email address and a password.
- (Optional) The user is guided through a 2FA flow.
- The frontend asks the backend to try and find an entry in the database for that email address.
- The backend sends back the encrypted seed phrase.
- The frontend tries to de-crypt the seed phrase with the hashed password client-side.
From there, the a web3.eth.accounts keystore is created from the now decrypted seed phrase and kept in memory in the browser sandbox for further use.
Signing a Transaction
The keystore in the Morpher Wallet is actually just the most important component, which, in itself doesn't connect to a node. The architecture is built in a way that the wallet is embedded as an iFrame into another website.
If you direct your attention to the Vuex store, you'll find all the necessary functions when the wallet is embedded.
The actual signing is done by the web3 library and this is then handed back over to the parent frame, which embeds the wallet which is a custom HookedWalletProvider.
That's then forwarded to a node, through the normal web3 process, sending a signed transaction.
Conclusion
In a nutshell, that's how the internal nuts and bolts work. Obviously, there is a lot more to it than just signup, login and signing transactions. But for a quick introduction, that's probably enough.
The most important part for us is to have full control over the UI and how it behaves. We intentionally wanted to make the user onboarding simple, but leave enough controls for the user to lock down their wallet as needed.
Heck, you could even go, export the seed phrase, import into MetaMask and login to Morpher again. That's how standardized this is.
If you are interested in more, there's a full audit doc that goes into more details about how the encryption and decryption and data flow works.
If you want to integrate the wallet solution into your own website or DApp, then let us know! We're planning to completely open it up for other developers as well.
How to get involved and learn more:
- Fill out the SDK Request Form
- Explore MorpherWallet on Github
- Visit the Wallet Landing Page
- Try Morpher Wallet in your browser
Disclaimer: All investments involve risk, and the past performance of a security, industry, sector, market, financial product, trading strategy, or individual’s trading does not guarantee future results or returns. Investors are fully responsible for any investment decisions they make. Such decisions should be based solely on an evaluation of their financial circumstances, investment objectives, risk tolerance, and liquidity needs. This post does not constitute investment advice.
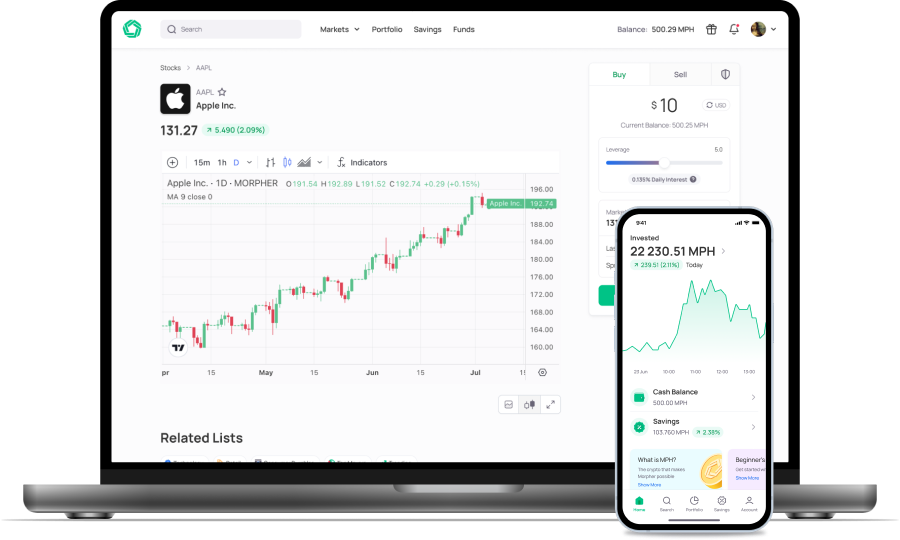
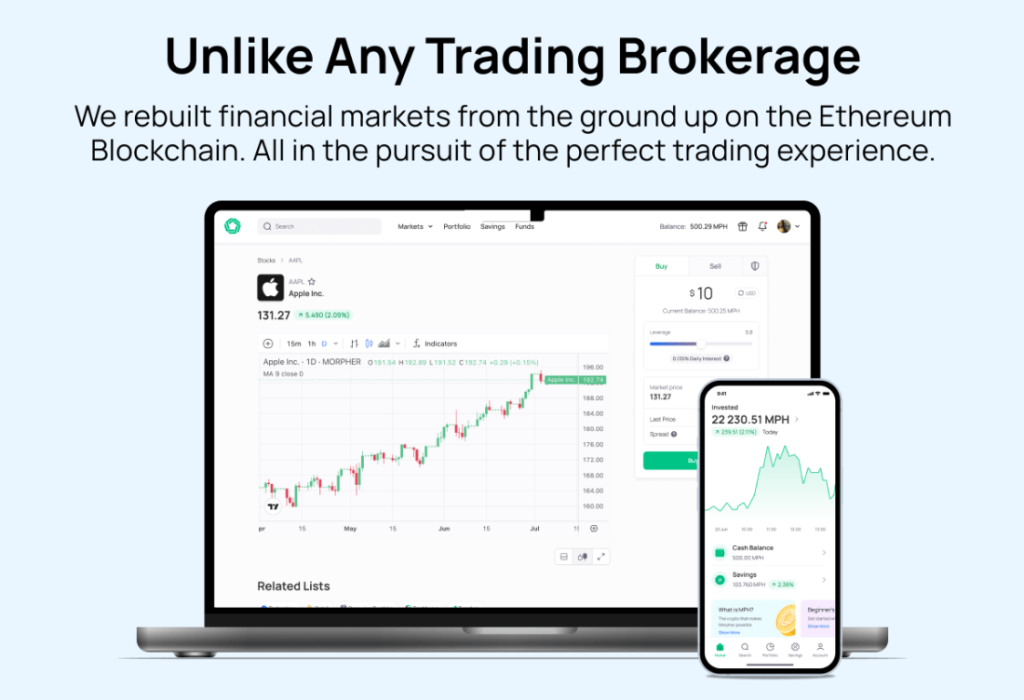
Painless trading for everyone
Hundreds of markets all in one place - Apple, Bitcoin, Gold, Watches, NFTs, Sneakers and so much more.
Painless trading for everyone
Hundreds of markets all in one place - Apple, Bitcoin, Gold, Watches, NFTs, Sneakers and so much more.